
Elegoo Centauri Carbon Upgrades – Tool-Drawer, Spool Box & Accessories 3D-Printed Kit
Elegoo CC UPGRADES
DRAWER AND GADGETS FOR YOUR
ELEGOO Centauri Carbon
IF YOU BUY IT, HERE'S WHAT YOU'LL GET:
1_PRINTABLE FILES FOR BAMBU STUDIO OR ORCA SLICER.
2_EASY-TO-FOLLOW ASSEMBLY MANUAL OR DIAGRAMS.
3_ DETAILED LIST OF REQUIRED HARDWARE.
4_ MY SUPPORT FOR ANY QUESTIONS OR ISSUES.

ALL THE MODELS YOU SEE ON THIS PAGE ARE AVAILABLE FOR INDIVIDUAL PURCHASE.
🧩 QUICK STORY
GOT ONE OF THE FIRST CENTAURI CARBONS — HAD NO CLUE WHERE THE MULTICOLOR PLUG WOULD GO 😅
NO WORRIES THOUGH! THE DRAWER FILE ALREADY INCLUDES A FIX SO IT WON’T COVER THE PORT.
CHECK THE PIC BELOW — AND HAPPY PRINTING!


Here are all the models you can get for this Centauri Carbon upgrade.
.png)
DRWRCC

SPLBox
.png)
RaizR

MFleR
-
Poop Drawer
-
Gridfinity Drawer
-
Gridfinity Boxes
-
Waste Pipe
-
Build Plate Support
-
Optional HULA Feet
-
Top Glass Lift Lid
-
LED Strip Ready
-
Seal Gasket Ready
-
Rear Fan Noise Reduction
-
Magnetic Mount
-
2 Spool Holders
-
Desiccant Gel Box
-
Humidity Sensor


DRWRCC
On the left side of the drawer unit, you'll see the plate holder mounted using two rails, this makes it super easy to slide on and off whenever you need it.


On the right, there’s a handy poop drawer (yes, the one for failed prints and purge lines) that connects to an external pipe, so waste gets funneled straight out from the printer.
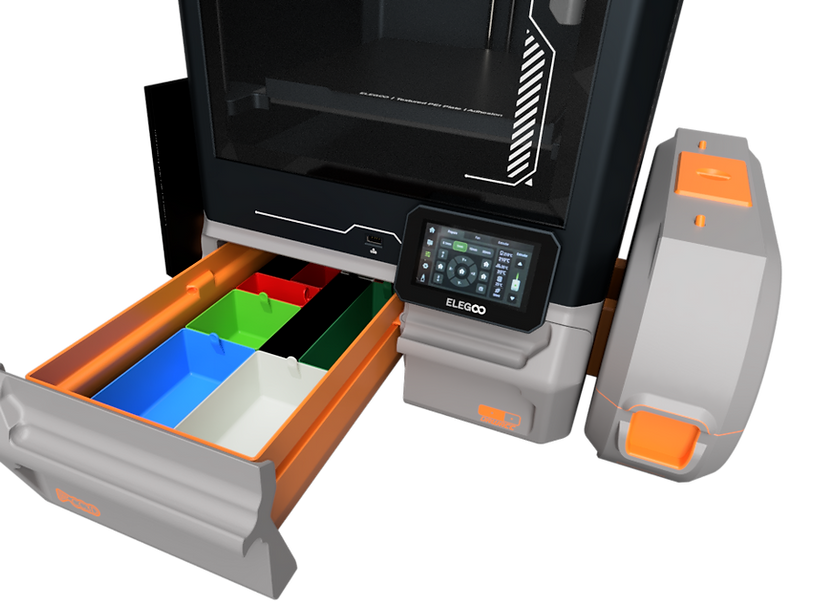
On the left-hand side, we’ve added a massive drawer base built around the Gridfinity system. Inside the download pack, you’ll also get a bunch of drawer designs to print, letting you mix and match however you like to organize your tools and bits.


For humidity control, we included a compact dehumidifier pod—just drop in some desiccant gel and pop a basic round hygrometer into the side of the lid to keep tabs on the moisture.
Just like the build plate holder, the spool box is mounted to the drawer unit using two rails, so it’s fully removable whenever you need it.

Take a peek inside the spool box and you’ll find room for two spools, each with its own nozzle to guide the filament out. The box seals tight with its own gaskets, and magnets hold the two halves together like a charm.

SPLBox


To make life easier when swapping spools, we’ve added magnetic lid holders—no more juggling the cover with one hand while working with the other.

.png)
RaizR
The raizer doesn’t just give you more space only for the PTFE tube, helping filament feed more smoothly to the print head. It’s designed to support an LED strip too, so you can brighten up the inside of your printer.
It includes slots for gaskets both around the glass and between the raizer and the printer itself to help prevent unwanted vibrations or noise.
Plus, there's a built-in stopper to hold the glass lid open if you need to vent hot air from the print chamber.

External dimensions

Print time and materials by model
DRWRCC
SPLBox
RaizR
MFleR
Print time
3D 18H 50m
Print time
1D 9H 10m
Print time
19H 46m
Print time
3H 36m
Filaments
PETG
1.8 KG
PETG
1.4 KG
Filaments
PETG
0.9 KG
PETG
0.3 KG
Filaments
PETG
0.7 KG
PETG
20 G
Filaments
PETG
0.15 KG
All the hardware you’ll need is listed in the assembly guides included with each model. You’ll find these guides in the download package after purchase.
Model Presentation Video
JOIN THE CLUB, SAVE BIG, AND GET FREEBIES! SUPPORT MY WORK AND BECOME A MEMBER TO ENJOY AN AVERAGE OF 50% OFF ON ALL PRODUCTS PLUS FREE MODELS AND UPGRADES!IT'S A SMALL INVESTMENT FOR HUGE REWARDS, DON'T MISS OUT!